1450 farm
Learning as we grow on our small farm in lfk
Choosing a Coop Design for your Farm

There’s no “right” way to build a chicken coop, but there are plenty of wrong ways. Trust us. When we first seriously considered getting chickens we had read a ton of reference material from the likes of Joel Salatin, Harvey Ussery, and Glenn Drowns. We definitely knew what we were doing. Well, to date we have built four chicken coops and are going to be starting number five in short order. Clearly we are slow learners and you should certainly be cautious in taking any advice from us on this matter, but hopefully you can learn from our mistakes and get it right the first (or second) time. As with most things, nothing can replace experience. What is right for our context could be a disaster in yours. Today we’re going to discuss the coops we have and what our future coop plans are.
The coop that started it all:


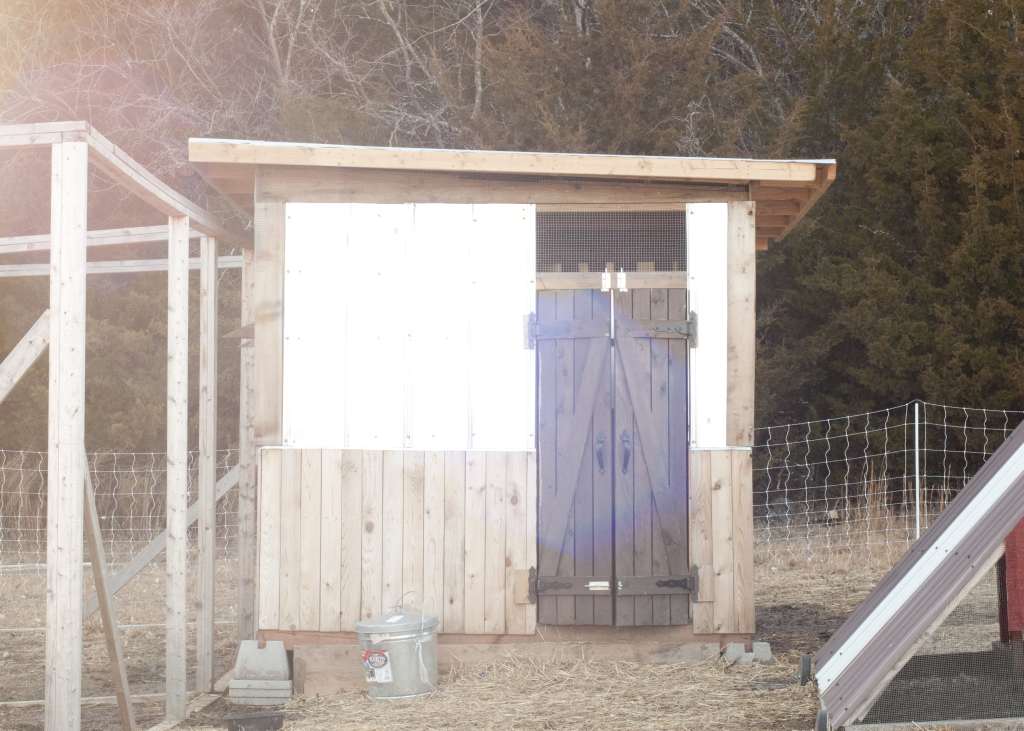
We actually got a lot of things right when we built our first coop, but there are several things we would change if we could do it again. As we mentioned in previous posts, we had every intention of getting chickens when we lived at our last house, but life got in the way, and we had to alter those plans. We knew we wanted a coop that could be moved around the pasture to minimize impact on the soil and forage. With this in mind we decided to build our first coop on a trailer. This is actually a really good idea for people that don’t want a typical, stationary coop with a scorched-earth run off of it. Chickens will eventually denude any vegetation around their coop and you will be left with an area that won’t regrow and will turn muddy with the rain. With this mobile coop idea in mind we drove to the nearest Harbor Freight and bought a 4’x8’ single-axle trailer to use as the foundation. It was cheap and there would be no waiting for the right trailer to pop up on Craigslist. Okay, that was mistake number one. With a little patience we could have almost certainly found a better, bigger, and cheaper trailer for sale locally. Mistake number two was buying a single-axle trailer with no tongue jack. After adding a fairly unstable tongue jack to the trailer we framed up walls with windows on two sides and a man door on the back wall of the trailer. With the walls up a sheathed with thin OSB we realized we wouldn’t be getting chickens any time soon because we were selling our house and moving into town while we built our new house. We hooked the trailer up and towed it to our new land and parked it behind a row of cedar trees where it would become home to packrats while the OSB rotted and warped in two years of extreme Kansas weather. We probably should have finished the coop before parking it, but it ended up working out ok because we decided to tear off the sheathing and add 18” on each side to make it 7’ x 8’ allowing us to house more birds.
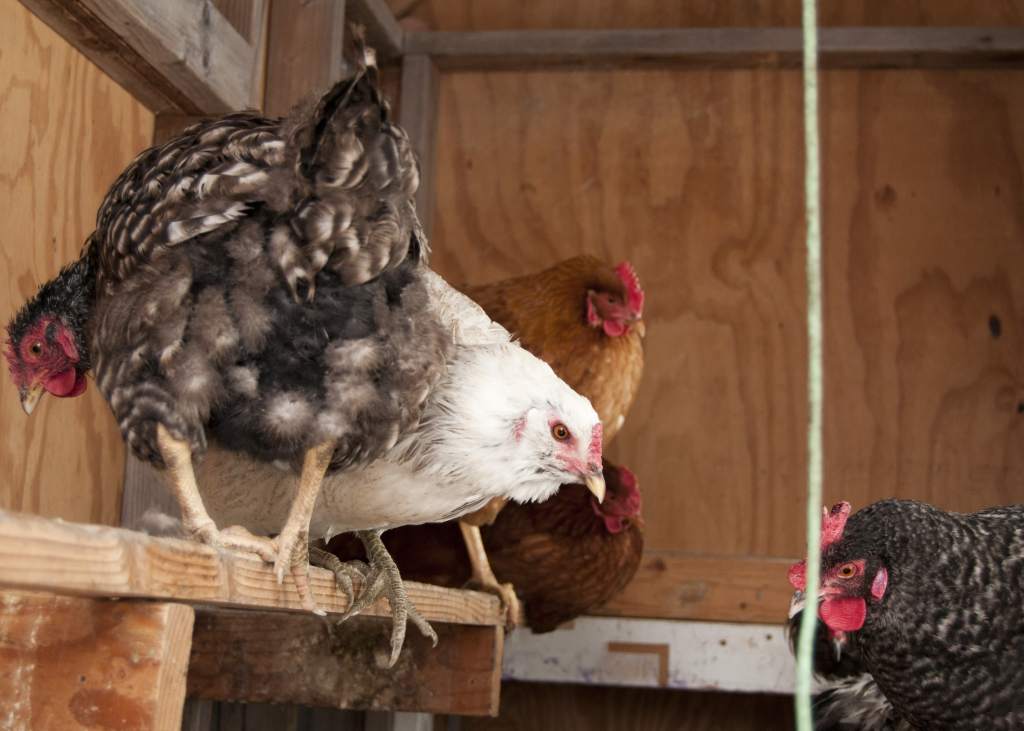
Once we were all moved into the new house our focus shifted back to adding chickens to our lives. We took the leap and ordered 25 (the hatchery minimum) at the end of 2015. So, while we’re pointing out things we did wrong with our coops we should probably add that it’s not really wise to order chickens when you don’t have a coop and maybe you should just go to the farm store and get a handful of chicks when you’re starting out. When you start designing your coop you should figure out how many chickens you ultimately want to have to determine how big your coop needs to be. Coops that are just being used to house the birds at night and during inclement weather don’t need to allow as much floor space as coops that will house birds full time. It’s advisable to at least allow your birds a run to go out in during the day where they can scratch around and do chicken things, but if you can’t or won’t do that you should probably have 10 square feet of coop space per bird or more (or don’t get chickens). If you are going to let your birds out to range you can get by with as little as a couple square feet of interior coop space per bird. Just something to keep in mind when you see those tiny coops at your local farm store that they claim can house 10 birds. We had 56 square feet to work with in our first coop and decided that we would be fine ordering 25 chicks because half of those chicks would be roosters and would only be in the coop for a few months before being processed and they would be allowed to day range inside paddocks of electrified poultry fence. What we didn’t realize when we built the coop was that our real limiting factor was roost space. With the bump outs at the bottom we were able to create real, useable floor space for the birds, but higher up we could only squeeze in two roost bars that totaled around 14 feet of roost space. It’s recommended to have around 8” of roost space per bird. We are comfortable housing 12-16 adult birds in that coop, but we’ve stretched that at times. We staggered our roosts on either side of the coop to allow the birds to fly up to the shorter roost and then hop up and over to the other, higher roost. Having never owned chickens before, we didn’t realize the space they need to fly up to roosts. We would not build a coop as narrow as this one again. We made a pop door out one side in a manner that the door could swing down like a draw bridge and create a ramp for the chickens to walk out. Well, that worked great, but it didn’t reach to the ground. Easy fix, we just put something under it to keep it at a reasonable angle for the chickens to walk down. The bigger issue is that in short order, the space between the door and coop gets filled with pine shavings and other junk which prevents the door from closing. It can be brushed out, but still an unpleasant step. Finally, we added a nest box that can be accessed from the outside of the coop. In a coop this small, this element is a life-saver. Initially, the nest box was one, oversized box, but the hens kept kicking all the straw out and didn’t always lay in it. We added 2×4 partitions on the floor of the box and added another 2×4 across the bottom of the opening to keep the straw from getting kicked out as easily and now they lay in it consistently and we don’t have to freshen the straw as often. That nest box has three spots, but the hens typically all lay in the same one. Go figure.
With the coop built and chicks brooded it was time to move them to the big coop. Well, after moving the coop into the field we realized that we had made a big, heavy coop that was poorly supported. We maybe moved it two or three times, but it took way too long and it was terribly difficult to re-level each time. It has since been parked in a permanent spot and the pop door now stays open full time leading into a huge run. We built the run something like 24×40 feet with 8’ tall walls covered in welded wire and added aviary netting over the top. This has been a really valuable area to have in the late fall and winter as our red-tail hawk pressure ramps up tremendously. Where we may have a couple hawk-related casualties the rest of the year, we tend to lose a couple birds a week when the weather turns cold. So, this coop has served us well, but it would have been much better had we done something similar, but used an old hay wagon as the foundation so that it would have been bigger and we could just hook up and pull it forward without having to worry about leveling it.
Our second coop came straight out of Harvey Ussery’s book The Small-Scale Poultry Flock. Once we realized the limitations of our original coop we wanted to add something that would be affordable, quick to build, and mobile. We also wanted a place that would allow us to separate out the roosters as they began to mature and started relentlessly tormenting the hens. Since we had a lot of scrap lumber laying around and a small pile of free steel siding from a family member we figured the Ussery plan would fit the bill and cost us less than $100 in materials we didn’t already have. This coop is a basic A-frame that allows the roof to serve as the walls and the cross bracing to serve as roost space while also providing the structural integrity. We have used this coop to separate roosters from the rest of the flock and we have also used it to house our chickens while we started raising our ducks in the first coop. This design is really great and super easy to move. The wheels are removable to allow the coop to sit directly on the ground when it’s not being moved. In just a couple minutes you can pop the wheels on, drag it forward, and remove the wheels. We plan on using this coop to do a small batch of Cornish cross meat birds this year.


The downside of the A-frame is that the nest box Ussery recommends has a wire mesh bottom and we’ve found that our straw tends to not stay in as well. Since the roosts are basically the same height as the nest box, chickens tend to roost on the edge of the nest box and make a real mess of it. We likely won’t use this coop for laying hens again. They had a tendency to lay eggs on the ground, which resulted in us having to crawl into the coop on hands and knees to retrieve them. Not ideal. This is one aspect that could pose a challenge when we gather up our meat birds for processing. It would be nice to be able to walk in the coop or remove the top to be able to grab the birds. We’ll see how it goes, but if we decide to do meat birds on a larger scale we will probably shift to Salatin-style pens (which we will talk about if we end up building some).
The third coop we built was not really a well thought out one, but it would provide more floor space and the ability for us to walk in the coop easily. We have several stacks of pallets that inspired us to put on our Pinterest hats and create a chicken coop out of them. We framed up floor joists and a floor and then built walls and a roof out of the pallets. Then we took some cedar fence pickets that a builder was going to throw away and used those for the bottom half of the exterior walls and finished the walls and roof with purchased metal. We used 6’ tall shutters that the builder was also throwing away as saloon-style doors and cut a couple squares in the walls for windows. We skimped a lot on this coop and didn’t put a proper overhang on the roof, so we had some water getting in that would not dry quickly. Luckily it was so ventilated that the moisture didn’t create any respiratory issues for the birds, but if we had kept them in there long-term we would have needed to correct that for sure. The idea for this coop was that some of the chickens would live in it for a while, but it would ultimately become our turkey coop. It butts up to the end of our run that has some framing that we plan to enclose and build turkey roosts in. Well, that plan got scrapped when we decided to get our livestock guardian pups. The chicken/turkey coop is now an 8×8 doghouse and we’ve extended the roofline so they are protected from the elements. We will probably put in some window awnings and fix one leaky spot, but it’s proving to be a great, cozy shelter for them.
Our most recent chicken coop was motivated by a rash of hawk attacks this past fall. We lost a handful of hens in about a week and a half. The final straw was when a hawk flew into the chicken/turkey coop and killed a hen right in the middle of the coop. It flew out when we showed up to collect eggs that day. Well, we like our hens to have access to fresh pasture every day, so we decided that another mobile coop would be best. We wanted something that would be easy to move, easy to collect eggs in, and would protect the birds from aerial predators. After seeing several “hoop coop” ideas online we decided to create our version of one. Basically we just used some 2x4s on edge as the base frame with some corner bracing and arched a couple 16’ cattle panels from one side to the other. With some added bracing across the ends and inside we had a surprisingly stable coop that we could walk into. We covered the ends with hardware cloth and put chicken wire at the bottom of the sides. Then, we fastened a tarp across the top and made some nest boxes out of 5 gallon buckets and we were in business. We put this coop in our garden area and let the chickens till for us as we moved them forward every day. Well, everything was going fine until two stray dogs managed to shred the tarp and a little terrier was able to rip back some of the chicken wire and squeeze through a grapefruit-sized hole in the side. Needless to say, we lost more hens that day than we would have lost to hawks all winter. In hindsight we were lazy. We should have secured the coop better and still used our electric net fence around the coop even though the chickens wouldn’t actually be leaving it. The remaining chickens have since been moved back to our original coop with the protected run and we have been adding organic matter to the run to allow them something to dig around in. If you are going to use a run for your chickens rather than let them range, it would be a good idea to look into using a deep litter method. You can add hay, wood shavings, leaf litter, food scraps, etc. and the chickens will basically make compost for you. We really liked everything about the hoop coop design, but it would require some beefing up to return to use in our system. Perhaps once our LGDs are older they would be able to deter any would-be predators from it.


As you can see, we haven’t mastered the art of the coop yet. Not counting the Cornish cross, we have 33 chicks coming from the hatchery and we are planning to incubate around 4 dozen eggs to coincide with our hatchery order. So, we clearly need to make arrangements for additional housing. Fortunately, we are a little less than a month out from having chicks and we can factor in an additional 3-4 weeks of brooder time after they arrive, giving us almost two months to get that infrastructure in place. Again, not advisable, but we can’t help ourselves sometimes. We haven’t quite settled on exactly what the next coop will be, but we’re leaning toward something that will be able to house >100 birds. It will likely be a structure that we put in the middle of our pasture so that we can run paddocks of electric fencing off it rather than moving the structure itself. Ideally we’ll be able to rotate their paddocks with the sheep, so it may end up being a structure that can house both species. The alternative to that would be to make another, albeit much larger, mobile coop. The idea behind that would be that we could move it along behind any ruminants we decide to graze (sheep or cattle) and they can scratch through the manure for worms and bugs while spreading it around as fertilizer. The downside to the mobile coop would be increased labor in moving it, but it would fall more in line with the regenerative grazing practices we would like to incorporate in our pastures. We will devote an entire post to the planning, building, and implementation phases of that process once we get it figured out. The clock is ticking.
So, if you’re thinking about building a chicken coop, try not to make the same mistakes we did. Really take your time and think through what your goals are for your flock. We’d love to hear about your coops and what things you like and dislike about them!

Pingback: Spring To-Do List – 1450 farm
Pingback: Brooding Chicks – 1450 farm
Pingback: 7 Essentials for Chick Starting (brooding) – 1450 farm
Thank you for sharing. Really, this post is very helpful for me in select the right chicken coop. Very informative. Thanks again.
LikeLiked by 1 person